Keywords: eHub OS, Onboarding, Registration, Edge Mobile App
The registration process associates the eHub OS System with the user’s account and the location where it is or will be installed, thus allowing full management via proprietary applications viz eHub Service Portal (Cloud Portal, also called Service Portal), Edge Mobile App and Konnect VPN.
Pre-requisites for Registration
The pre-requisites for registration process are as follows.
Group should be existing within the e3 Systems organization. This activity is done by Sales team as part of Group Onboarding and out of scope of this document.
-
The user should have an active email account on which the Group Admin can send an activation request.
-
The user should have the Edge Mobile App installed on their Mobile device.
-
The eHub OS System to be registered must be connected to the Internet.
Steps to meet these pre-requisites are as follows:
Activating personalized Account
To activate the personalized Account, perform the following steps.
Steps
-
Share the email account that would be used for the purpose of accessing the eHub OS System and related applications.
-
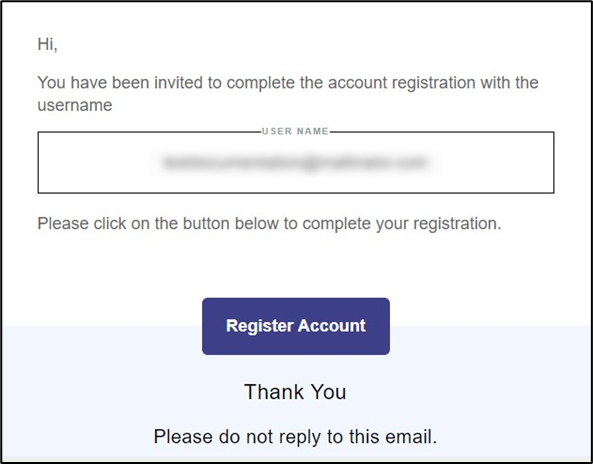
The Group Admin will initiate account activation based on the user’s email account, upon which the user will receive an email from Accounts, see Figure Invitation to Register Account.
-
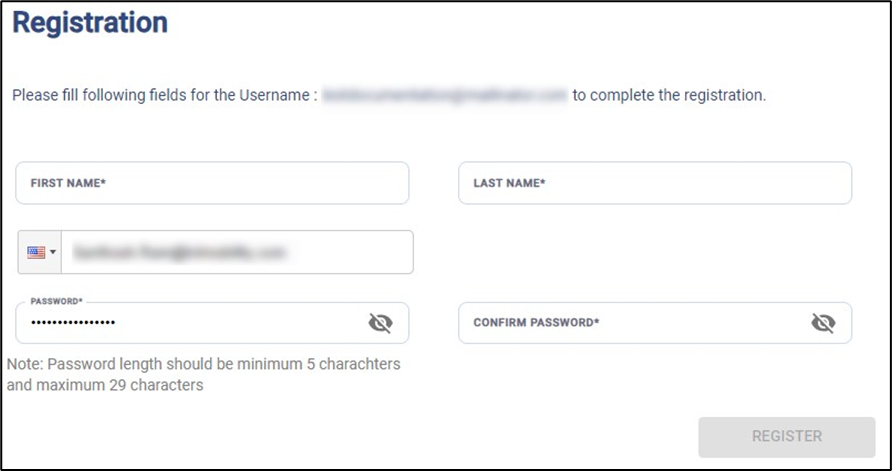
Click on Register Account button at the bottom of the email body. The user is directed to the Account Registration System, see Figure Registration Page.
-
Enter the required details in the form.
-
Click Register button.
The account will be activated successfully. At this point the user can access the eHub OS Portal, Edge Mobile App, Konnect Application and eHub Service Portal.
Installing Edge Mobile App
To install the Edge Mobile App, perform the following steps.
Steps
-
On the Mobile device, open the App Store or Play Store.
-
Search for the ‘Edge’ App and download it.
-
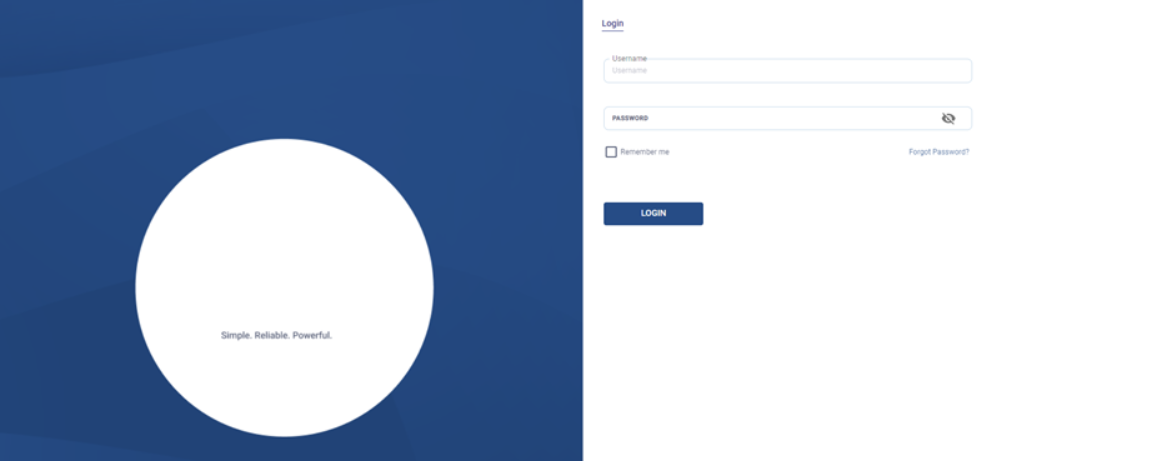
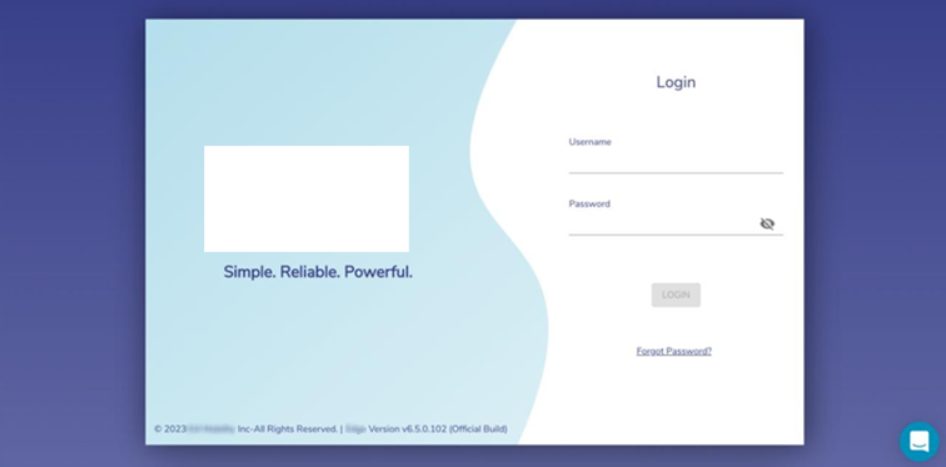
Open the app to see login screen, see Figure Application Login Page.
-
Login to the app with the activated account credentials.
-
The user is successfully logged into the Edge Mobile App.
Powering up eHub OS System and connecting to Internet
Before getting started, the user must ensure that the eHub OS System is installed and powered up as defined in the previous section Installing eHub OS.
If there is some doubt, then audit the system, and it is reasonable to power cycle the eHub OS System before starting. The proper power cycle procedure is to disconnect the eHub OS System AC Power plug from a UPS AC Outlet for 20 seconds and then re-insert. The eHub OS System will take 5 minutes to power up. The step assures a clean reboot and power up; short power loss/hits will not provide a clean restart of the system.
IT IS VERY IMPORTANT that POWER SUPPLY to the eHub OS System is stable and does NOT blink on/off frequently, thus UPS connectivity and clean power off/on requirements are stated. Please contact the system administrator to recommend appropriate UPS solutions for the eHub OS System.
If the eHub OS System is properly powered up, verify the LAN Ethernet link from the eHub OS System is operating as intended.
To verify the LAN Ethernet link and IP connectivity to the eHub OS System, perform the following steps.
Steps
-
Connect a laptop Ethernet port to the eHub OS System RJ45 LAN Ethernet port, see section eHub OS System - Physical Design – leftmost port. The laptop Ethernet port should be configured for DHCP Client services and will request an IP from the eHub OS System.
-
To verify whether the Ethernet link is active in windows, click the Internet Access icon, and then click Network Status. Check the Ethernet Status; the Ethernet link should be up and 1000 Mbps. The eHub OS System by default has DHCP enabled and will assign the IP address within the 192.168.230.0/24 space. The eHub OS System will have the GW IP address of 192.168.230.1 and DNS of 8.8.8.8.
-
Depending on the connectivity of the CELL (LTE) system, the user may/may-not have Internet connectivity.
-
To verify the IP address in Windows, click the Internet Access icon, click Network Status, and then click on the active connection. The IP information is displayed.
-
If the Ethernet link is up and IP is assigned to the laptop, then the system is ready for registration.
Registration Process
Registering eHub OS System with eHub Service Portal
After the pre-requisites are met, the user can go ahead with the registration process. To do the registration using eHub Service Portal, follow the steps described below.
Steps
-
Open eHub Service Portal at https://ehub.e3s.com
-
Login with valid credentials.
-
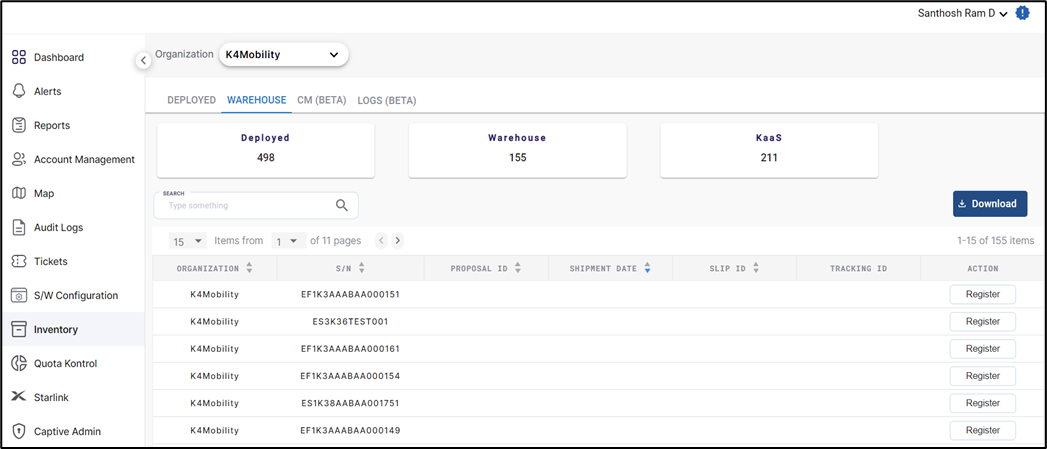
Select Inventory from the left menu bar.
-
Click the Warehouse tab. The list of all available devices displays in the table below.
-
Note the serial number of the device as mentioned on the box. In the SEARCH field, enter this serial number of the device.
-
The table displays the device details corresponding to the serial number.
-
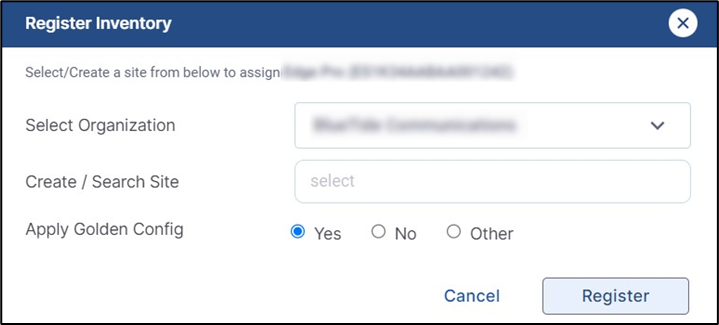
To assign the device to a Group and Site, click the Register button. The Register Inventory dialog box opens.
-
Select the required Organization from first dropdown menu.
-
Next the user has to select the site. The Site Name must be unique for the Group deployment. Multiple eHub OS nodes can be in a single Site. The options here are to use an existing Site or add a new Site.
-
In the CREATE/SEARCH SITE field, type the name of the required site.
-
Select the site from the list of existing sites in the system.
-
Click Yes radio button to apply the default configuration of the Organization.
-
Click Register to assign the device to the selected site.
-
To add a new Site, enter the name of the site and click CREATE. This will create a new site and assign the device to that site.
-
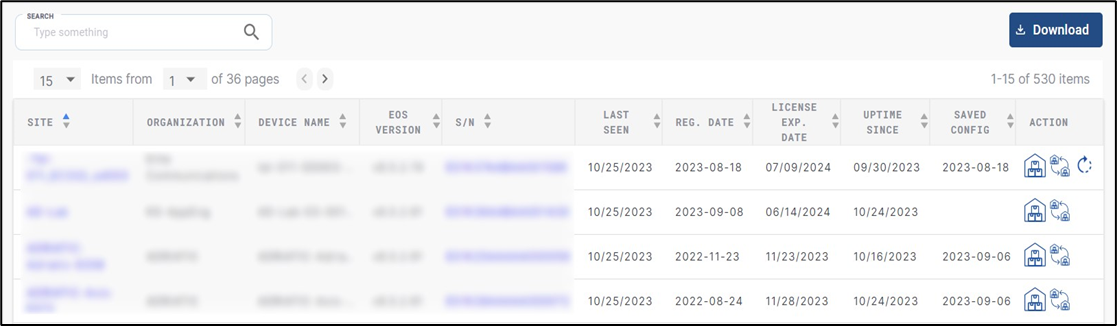
Once assigned, the device gets moved from the Warehouse tab and is displayed under the Deployed tab.
-
The table in the Deployed tab displays information such as Site name, Device type, Serial number, Registration date, Organization name etc.
This completes the Registration Process.
Registering eHub OS System with Edge Mobile App
The registration process can also be done using the Edge Mobile App. The workflow is depicted in the figure below.

To register the eHub OS System, perform the following steps, see Figure Registration Flow via Edge Mobile App.
The workflow detailed below is using the Edge Mobile App.
Steps
-
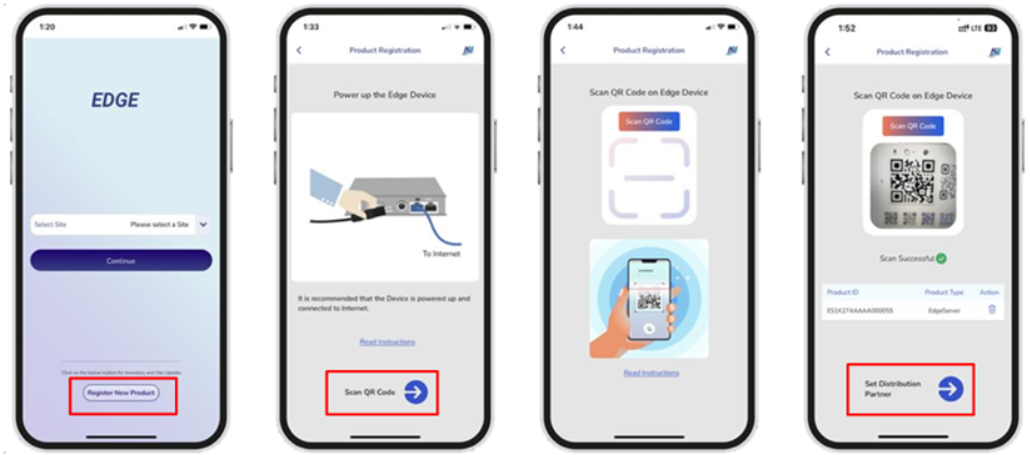
Login to the Edge Mobile App. The landing screen of the application will open.
-
Click on Register New Product button.
-
Click on Scan QR Code button. The QR Code scan option becomes available.
-
Scan the QR Code available on the eHub OS System box. The system is identified, and its serial number and type is displayed in the table below.
-
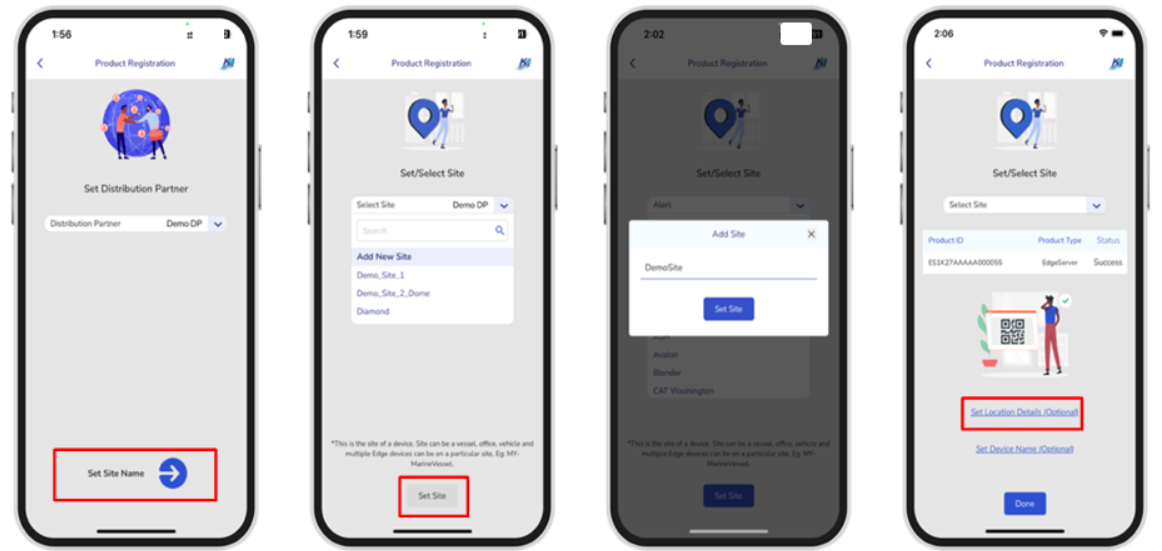
Click on Set Distribution Partner button. This is an optional step and is required only when the system needs to be assigned to a Sub-Group within the currently assigned Group.
-
Click on Set Site Name button. A Site is a Vessel, Store, Car, Truck, etc. where the eHub OS System will remain present and can reliably be identified by management. The Site Name must be unique for the Group deployment. Multiple eHub OS nodes can be in a single Site. The options here are to use an existing Site or add a new Site.
-
Click on the Select Sites drop down. To add a new Site, click on Add New Site option. The Add Site popup appears. Enter the new Site Name. The Site Name is successfully updated. To assign to an existing Site, select the site from the drop down and click on Set Site button at the bottom of the screen.
-
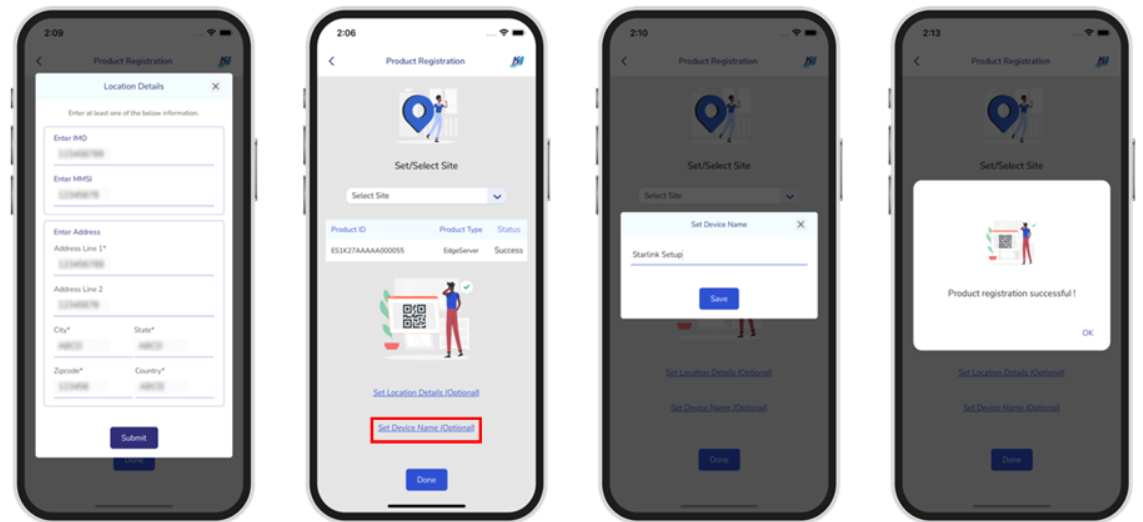
Click on Set Location Details. This is an optional step to add Site Address, IMO, MMSI. Enter one or all details and click Submit button.
-
Click on Set Device Name. This is also an optional step to identify the eHub OS System uniquely on a particular site. Enter the Device name and click Save button.
-
Click Done button.
-
A success popup will be displayed for a few seconds, and the user is directed back to the Home Screen of the Edge Mobile App. This completes the Registration Process.
Login to eHub OS via eHub OS Portal
This section describes how to log on to the eHub OS System via eHub OS Portal after successful registration.
To login to the eHub OS System via eHub OS Portal, perform the following steps.
Steps
-
Open any browser.
-
Enter the IP address of http://10.0.254.1 and hit return – The eHub OS System IP can be accessed. The Login page appears, see Figure Login Page.
-
Enter the personalized account credentials.
-
Click Login button.
-
If Two Factor Authentication is enabled for the user, a security code would be sent to their registered Email Address.
-
Enter the Security Code and click Verify button to login to the eHub OS Portal.
Note: It is also possible to login to the eHub OS Portal via a temporary login with Username/Password as edge/edge. It is possible to change the password for eHub OS login account, see section Figure Changing eHub OS Login Password. It is however recommended to use the personalized account to view and use full functionality of the eHub OS Portal.
-
After successful login, the user will be routed to the Home Page i.e., the Configuration Wizard. eHub OS System Configuration Steps are detailed in Figure Commissioning eHub OS System.
-
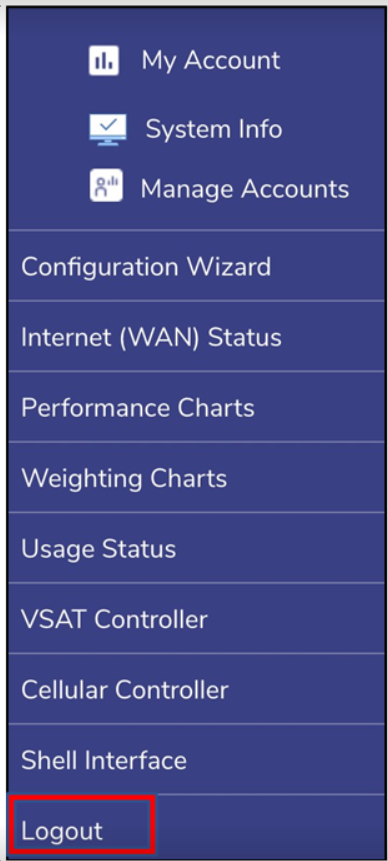
To logout from the eHub OS Portal, click on the Menu on the top right and then click Logout, see the figure below.
Viewing eHub OS System through eHub Service Portal
-
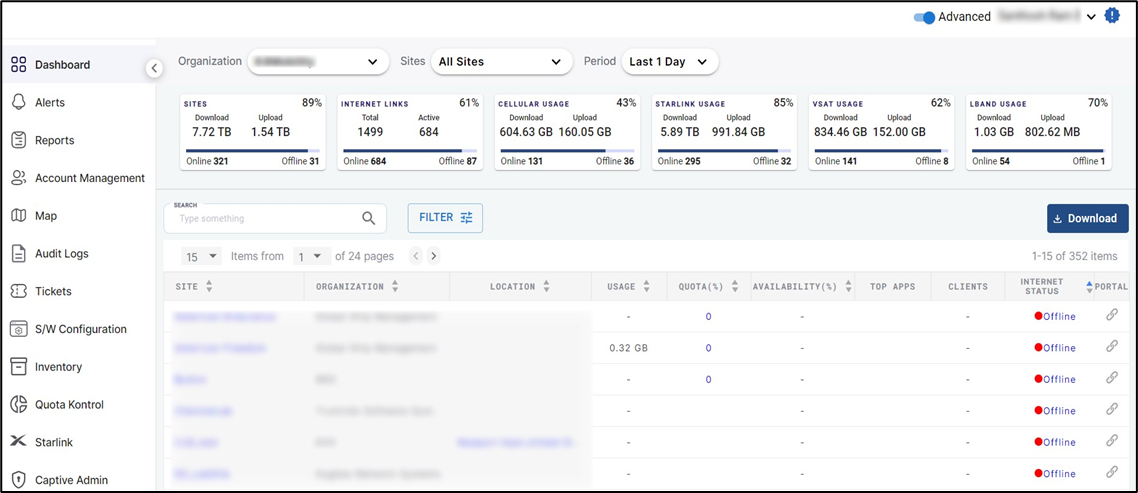
The eHub OS System becomes accessible via the eHub Service Portal. This portal is available on Cloud and is useful to monitor the health of the eHub OS System and its vital statistics.
To view the eHub OS System on eHub Service Portal, perform the following steps.
Steps
-
Open eHub Service Portal at https://ehub.e3s.com The eHub Service Portal login screen appears, see Figure eHub Service Portal Login Page.
-
Login to the eHub Service Portal with valid account credentials. The Site and System become available on the Home Screen. The status of the System and its Interfaces can be viewed along with other vital statistics, see Figure eHub Service Portal Portal.